
Train your staff to handle patient questions over the phone and use these three tips to convert more calls into appointments for your aesthetics clinic.
January 14, 2020
TEL: (+62) 21 5890 1590

Venus Concept is a leader in the global medical and aesthetic device market, pairing best-in-class technology with the first and only true subscription model in the industry.
![]()
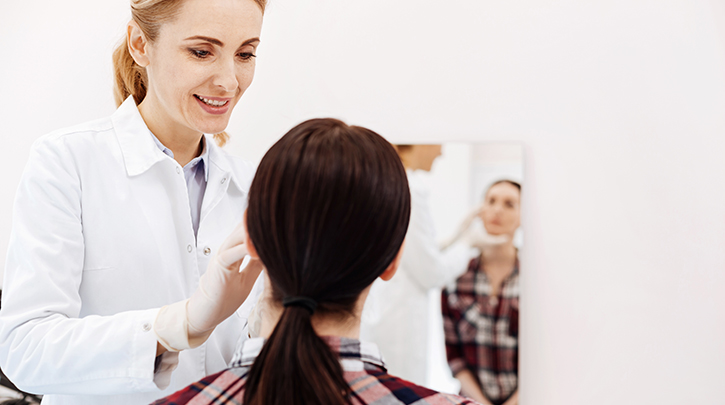
Before-and-After photos offer a major benefit to any aesthetic consultation conversion—that cannot be exaggerated. Using Before-and-After galleries during a new client consultation is an industry standard, but using them effectively to boost your conversion rate without overselling can be a fine balance. Show off the wonderful results and transformations that your aesthetic clinic has produced to ensure a productive consultation. Here are some tips to ensure you’re using Before-and-After galleries to their full potential while keeping a prospective client’s expectations in check.
When creating a Before-and-After gallery on your website or in a print binder format for in-office use, try to avoid using too many stock photos from manufacturers or images from other providers. Using your own Before-and-After pictures will help to illustrate your expertise and realistically manage a prospective client’s expectations.
Ensure your galleries include a range of treatments, and feature clients from different demographics. Select an array that best represents your skills but don’t pare down too far. In a survey of more than 1,000 consumers considering cosmetic surgery, 77% reported that they’d need to see around 11 sets of photos of previous clients to confidently opt for a treatment or doctor. In that same survey, 29% of respondents said they’d need closer to 30 sets to confidently decide.
In other words, the more photos you have on hand, the better. This may require setting up a consistent process to record and collect photos after treatment plans have been completed. Make sure that proper consent is captured from the patient to be able to use the material in multiple ways. This would likely require some sort of media-release agreement.
Social media is one of the best mediums through which to share Before-and-Afters. Make the most of your practice’s social media presence by letting your targeted audience know not only what services you offer but also how effective they are. When done correctly, a Before-and-After is a testament to a problem solved, and prospective clients want to know that you can help them overcome their concerns. Through patient consent, share their Before-and-Afters with a brief explanation of the treatment performed and the results achieved.
‘Before’ photos are important to establish a baseline so that you and your client can assess progress and changes, over time, once they’ve committed to your treatment strategy. This is especially useful for longer treatment plans with gradual results. Patients can quickly become used to their enhanced appearance and forget how they looked before treatment. This is especially true for treatments that require a long period of waiting time before full results are revealed. A great example of this would be hair restoration procedures–on average a minimum period of 12 months is required before the transplanted hair follicles are fully grown in. Having Before-and-After images on hand can be helpful in reminding them of the results, and useful to fend off a lawsuit if complaints go too far.
Considering the impact a Before-and-After gallery can have on a client’s decision to opt for a treatment, a professional studio space may be the best area to invest some extra capital.
Truly standardized photos, which can be directly compared to one another without distortion from different lighting or angles, require a dedicated spot for photo-taking with high-quality cameras, controlled lighting, and tripods. Invest in professional photography equipment and software that can help improve the quality of images. These can help ensure that you capture realistic images where the transformation will not be attributed to the difference in lighting or angles, but to the results produced.
When creating your dedicated studio space, a simple white backdrop is best. Avoid vivid or pastel backdrop colors, as they can reflect on your client’s skin. Also avoid any areas near windows. Natural light can be inconsistent, being dependent on weather or the time of day. Instead, invest in studio lighting to ensure a quality photo every time. If you’re unable to avoid a window, install a blind that can be pulled down to control the amount of natural light coming in.
When creating a Before-and-After portfolio, be mindful of certain things that clients look out for. In one survey, clients said seeing someone who looks like themselves, seeing a range of outcomes, including some better than others, and knowing specifics about the case—such as age or treatment details—is important. Therefore, capture as many data points about the patient as possible when producing these assets.
Prospective clients appreciate and respect honesty, so don’t exaggerate to try and impress them. Instead meet clients’ expectations by offering up a comprehensive Before-and-After gallery that includes a range of potential outcomes, including cases in which treatments may have been less successful than anticipated.
Take the time to explain to the client what happened, and how you were able to resolve these cases and improve results through further steps. This is your chance to thwart any concerns your prospective client may have regarding less-than-satisfactory results, so take full advantage of this opportunity.
Be sure to proudly display the best Before-and-After transformations on all of your digital channels. Whether that may be your website, social media or digital ads, to ensure that they are seen and used to their full potential.
To discover more tips on how to effectively boost conversions during the consultation process, download our invaluable eBook, “Mastering the Art of the Aesthetic Consult.”
![]()
![]()
![]()
![]()
![]()
![]()
For more information call: (+62 21) 5890 1590 // info.id@venusconcept.com // Ruko Business Park Kebon Jeruk Blok B11 Jl. Meruya Ilir Raya No. 88 Kel. Meruya Utara, Kec. Kembangan West Jakarta 11620
REGULATORY CLEARANCES [ More ]
All devices have received Indonesian Health Ministry Approval for sale and use in Indonesia. (Izin Edar Alat Kesehatan)
Venus Versa™ is cleared by the FDA, licensed by Health Canada, and has CE Mark as a multi-application device intended to be used in aesthetic and cosmetic procedures. The SR515 and SR580 applicators are cleared by the FDA, licensed by Health Canada, and have CE Mark for the treatment of benign pigmented epidermal and cutaneous lesions and treatment of benign cutaneous vascular lesions. The HR650/HR650XL and HR690/HR690XL applicators are cleared by the FDA, licensed by Health Canada, and have CE Mark for the removal of unwanted hair and to effect stable long-term or permanent hair reduction for Fitzpatrick skin types I-IV. The AC Dual applicator is cleared by the FDA, licensed by Health Canada, and has CE Mark for the treatment of acne vulgaris. The DiamondPolar™ and OctiPolar™ applicators on the Venus Versa™ system are cleared by the FDA for non-invasive treatment of moderate to severe facial wrinkles and rhytides on females with Fitzpatrick skin types I-IV. The DiamondPolar™ applicator is licensed by Health Canada and has CE Mark for non-invasive treatment of moderate to severe facial wrinkles and rhytides on females with Fitzpatrick skin types I-IV. The OctiPolar™ applicator on the Venus Versa™ system is licensed by Health Canada and has CE Mark for temporary body contouring via skin tightening, circumferential reduction, and cellulite reduction. The NanoFractional RF™ (Viva) applicator is cleared by the FDA, licensed by Health Canada, and has CE Mark for dermatological procedures requiring ablation and resurfacing of the skin.
Venus Legacy™ is cleared by the FDA for the non-invasive treatment of moderate to severe facial wrinkles and rhytides in females with Fitzpatrick skin types I-IV with the OctiPolar™ and DiamondPolar™ applicators, and temporary reduction in the appearance of cellulite with the 4D Body (LB2) and 4D Face (LF2) applicators. It is licensed by Health Canada and has CE Mark for the temporary increase of skin tightening, temporary circumferential reduction, temporary cellulite reduction, and temporary wrinkle reduction.
Venus Viva™ is cleared by the FDA, licensed by Health Canada, and has CE Mark for dermatological procedures requiring ablation and resurfacing of the skin. The DiamondPolar™ applicator is licensed by Health Canada and has CE Mark for the treatment of moderate to severe wrinkles and rhytides in Fitzpatrick skin types I-IV.
Venus Freeze Plus™ is cleared by the FDA for the non-invasive treatment of moderate to severe facial wrinkles and rhytides in females with Fitzpatrick skin types I-IV. It is licensed by Health Canada for temporary skin tightening, and temporary reduction in the appearance of stretch marks at the abdomen and flanks, using the DiamondPolar™ and OctiPolar™ applicators. The DiamondPolar™ applicator on Venus Freeze Plus™ has CE Mark for the non-invasive treatment of moderate to severe facial wrinkles and rhytides, and the increase of skin tightening, temporary circumferential reduction, and cellulite reduction with the OctiPolar™ applicator.
Venus Glow™ is cleared by the FDA as a Class I motorized dermabrasion device. It provides a dermal rejuvenation treatment that works to open up and deep-clean pores. Venus Concept is the exclusive distributor for Venus Glow™.
Copyright © 2018 Venus Concept. All rights reserved.
You are entering our website. For other countries/regions and language options, please click the SELECT A DIFFERENT REGION button below.
SELECT A DIFFERENT REGIONAre you looking to get a treatment? Please visit our patient website to learn more.
Click Here